Hey there, fellow home decor enthusiasts! If you’ve ever walked through a high-end furniture store and gasped at the price tag of a designer lamp, you’re not alone. I recently saw a gorgeous, textured custom lampshade that cost more than my monthly grocery bill. That’s when it hit me: why buy it when I can make a DIY lamp shade that actually fits my personality?
Lighting is the “jewelry” of a room. It sets the mood, adds texture, and if you do it right, it becomes a total conversation starter. If you’re tired of that generic, beige, “came-with-the-lamp” look, it’s time to roll up your sleeves. You don’t need a craft room the size of a garage or a degree in interior design. All you need is a little patience and a few basic materials.
The “Skeleton”: Finding Your Base
Before we get into the pretty fabrics and trims, we need a frame. When it comes to a DIY lamp shade, you have two main paths:
- The Makeover: Take an old, ugly shade you already have. Strip off the old fabric until you’re left with the wire frame.
- The “Sticker” Method: Buy a pressure-sensitive styrene sheet. This is a fancy way of saying “sticky plastic.” You bond your fabric to the plastic, wrap it around two metal rings, and boom—you have a professional-looking custom lampshades setup.
If this is your first time, I highly recommend the makeover method. It’s low-stakes and great for the environment.
Simple Materials You’ll Need
You probably have half of this in your junk drawer already:
- Adhesive: A good spray adhesive or “Tacky” glue.
- An old lamp shade frame (or a cheap thrift store find).
- Trim: Ribbon, bias tape, or even pom-poms to hide the raw edges.
- Binder clips: These are your best friends for holding the fabric in place while the glue dries.
- Fabric: Cotton works best. Avoid anything too stretchy or too thick (like heavy upholstery fabric), as it won’t wrap cleanly.
Techniques for Preparing a DIY Lamp Shade
Technique #1: The Fabric Wrap (The Classic)
It is the easiest way to get that high-end look. First, lay your fabric flat. Roll your lampshade across the fabric, tracing the path with a pencil. Leave about an inch of “seam allowance” on the top, bottom, and sides. Cut it out, spray the back of the fabric with adhesive, and carefully roll the shade back over it.
The trick to making it look like a custom lamp shade and not a 3rd-grade art project is the tuck. Use a butter knife or a specialized tucking tool to push the excess fabric over the wire rings and inside the shade. It hides the raw edges and looks incredibly crisp.
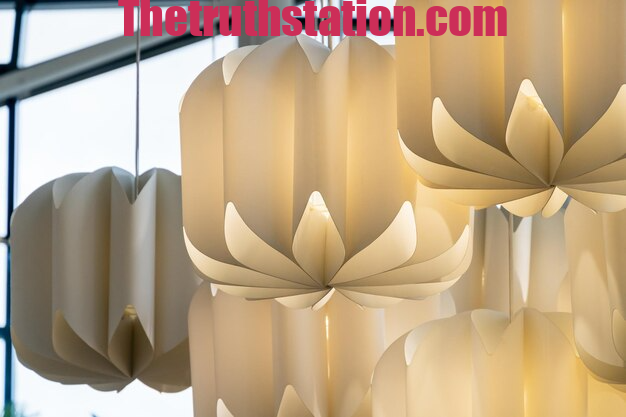
Technique #2: The Paper Map or Book Page Shade
If you aren’t a “fabric person,” paper is a fantastic medium. I’ve seen stunning DIYs using vintage maps, sheet music, or even pages from an old botanical book. As paper is stiffer than fabric, you don’t even necessarily need a top and bottom ring.
You can just glue the paper into a cylinder and attach it to a circular wire fitter. When the light shines through the paper, the text or map details glow beautifully. Just be sure to use LED bulbs—they stay cool, which is much safer for paper materials!
Technique #3: The “No-Sew” Pleated Look
Pleated shades are having a major moment in the “Grandmillennial” decor scene. To do this yourself, cut long strips of fabric. Glue the end of a strip to the top ring, wrap it down to the bottom ring, pull it taut, and glue again.
Repeat this, overlapping each strip by about half an inch. It creates a beautiful, textured accordion effect that looks like it cost a fortune at a boutique.
Why Custom Beats Store-Bought
The best part about a DIY lamp shade isn’t just the money you save (though that’s a nice perk). It’s the fact that it is uniquely yours. Want a leopard print shade with neon pink trim? Go for it. Want a subtle linen shade that perfectly matches your curtains? You can do that too.
Custom shades allow you to bridge the gap between “functional lighting” and “personal expression.” Creating your own lighting is one of the most rewarding weekend projects you can tackle. It’s tactile, creative, and literally brightens up your home.
FAQs
Q: What is the best fabric for a DIY lamp shade?
A: Natural fibers like cotton or linen. They handle heat well and adhere easily to glue or styrene.
Q: Is it a fire hazard to make my own shade?
A: Not if you’re smart! Keep the material at least 2-3 inches from the bulb and always use cool-running LED bulbs.
Q: How do I clean my custom shade?
A: Skip the vacuum. Use a lint roller or a dry microfiber cloth to gently whisk away dust without snagging the fabric.
Q: Can I paint an existing lamp shade?
A: Absolutely! Fabric paint or even watered-down acrylic works great for a quick color refresh.
Q: What glue should I use?
A: For fabric-to-metal, a high-tacky craft glue or a specialized lampshade glue is best. Avoid hot glue, as it can melt if the lamp gets warm.